Ghostbusters Props
Ver más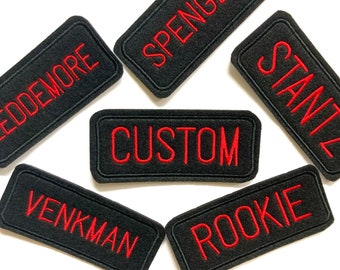
Cazafantasmas 2 GB2 Nombre Parche Hierro personalizado en parche o traje de etiqueta de nombre de gancho y bucle
Anuncio de la tienda EgonandCo De la tienda EgonandCo
MX$175.13
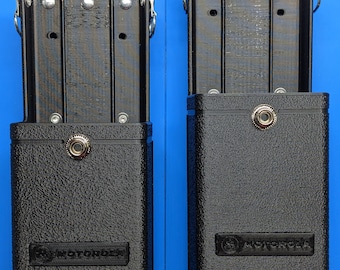
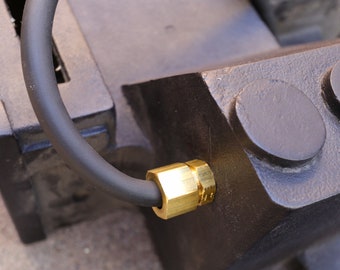
Cazafantasmas Llaveros Pantalla Precisa - Llaveros - Ganchos para cinturón - accesorios con precisión de pantalla - accesorio de cosplay hecho por fans
Anuncio de la tienda WhitakerLeatherCo De la tienda WhitakerLeatherCo
MX$226.80
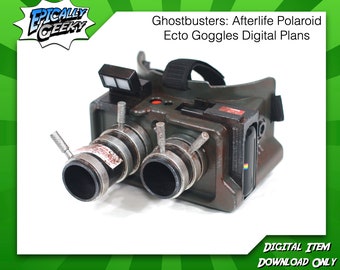
Cazafantasmas Afterlife Polaroid Ecto Gafas DESCARGA DIGITAL
Anuncio de la tienda EpicallyGeeky De la tienda EpicallyGeeky
MX$350.26
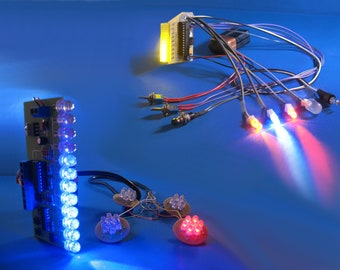
Ghostbusters Movie Prop - Proton Pack Light Board COMBO
Anuncio de la tienda JupiterElectronics De la tienda JupiterElectronics
MX$2,519.28

Parche bordado con el logotipo de Ghostbusters 2 GB2, parche para planchar, disfraz de traje de vuelo
Anuncio de la tienda EgonandCo De la tienda EgonandCo
MX$245.18

Parche bordado con logotipo de réplica precisa de la pantalla de los Cazafantasmas, parche para planchar, disfraz
Anuncio de la tienda EgonandCo De la tienda EgonandCo
MX$262.70
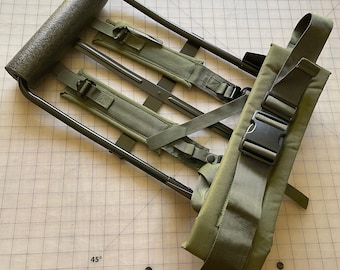
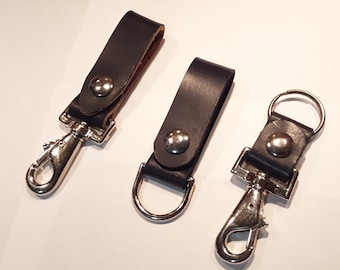
Acero ALICE LC-1 / LC-2 Marco Réplica Pack Marco con parachoques
Anuncio de la tienda sellgeek De la tienda sellgeek
Vendido
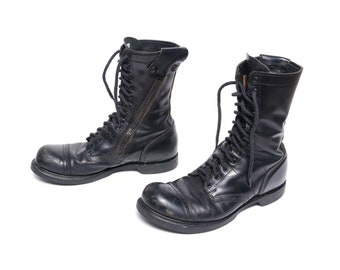
vintage 90s Corcoran botas de combate cap toe jump boots 1990 steel toe zipper side men size 11W 11 wide Made in USA
Anuncio de la tienda CarnivalOfTheManiac De la tienda CarnivalOfTheManiac
Vendido


Solo hay 1 y está en 4 carritos
Precio: MX$2,527.47
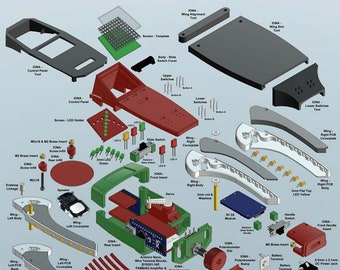
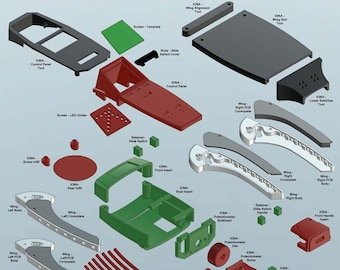
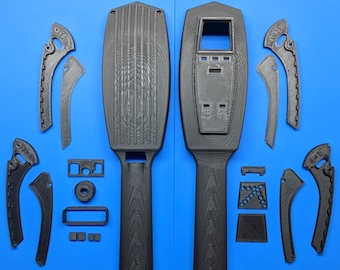
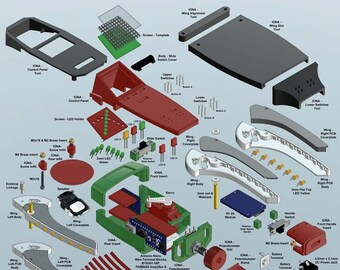
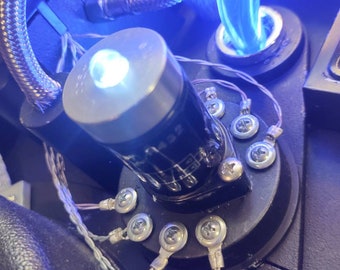
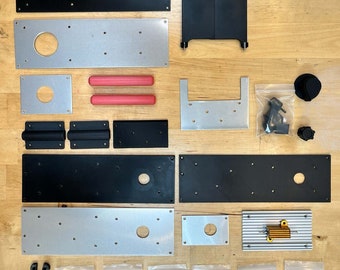
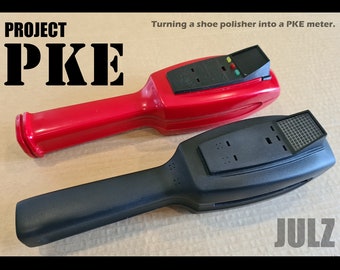
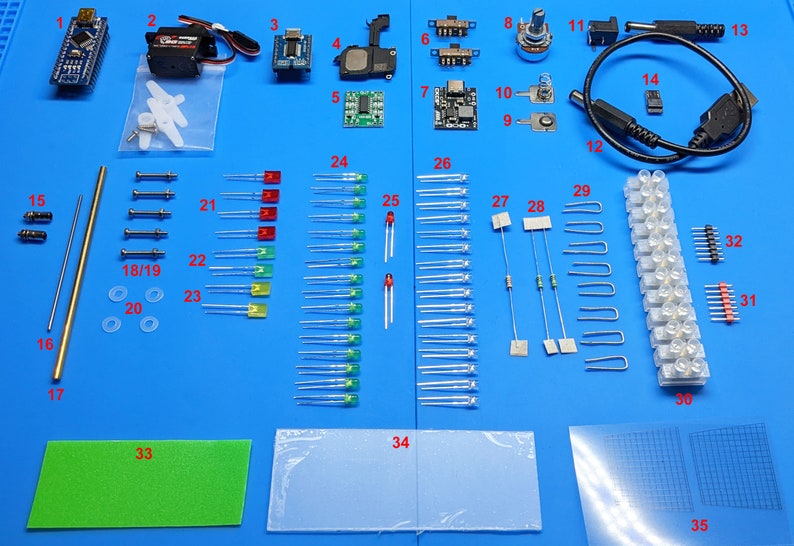
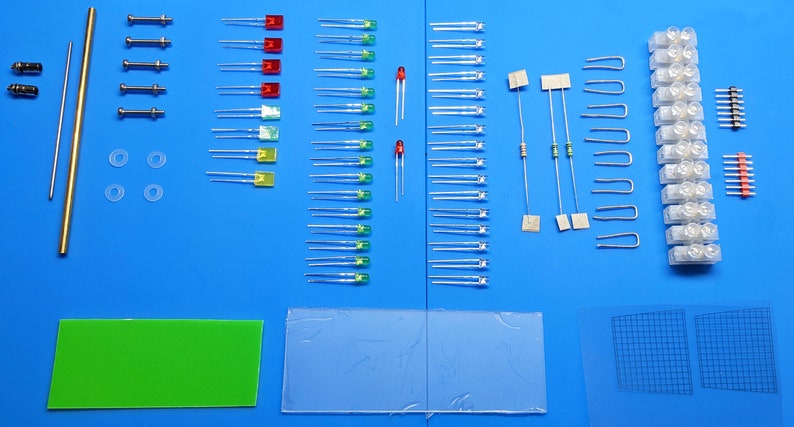
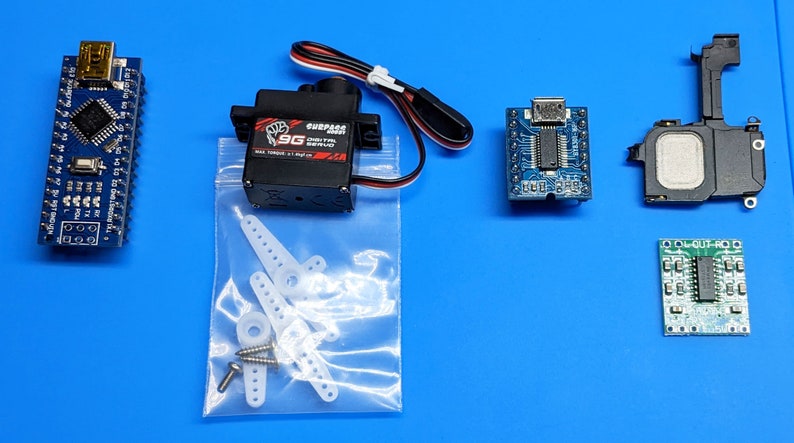
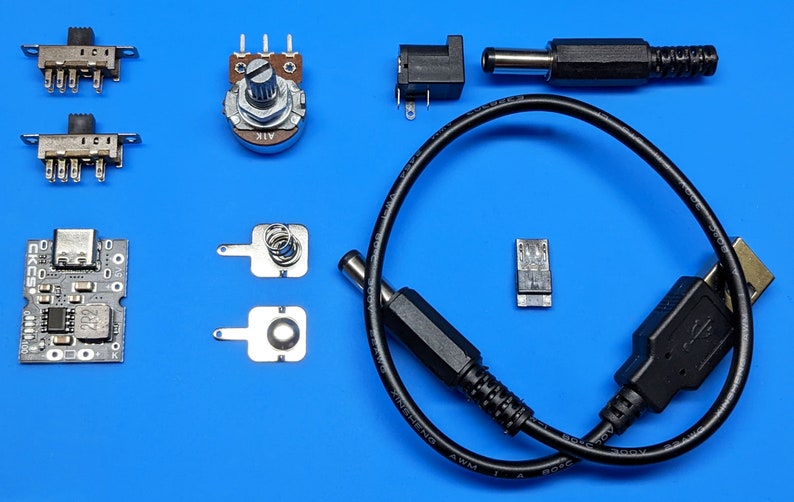
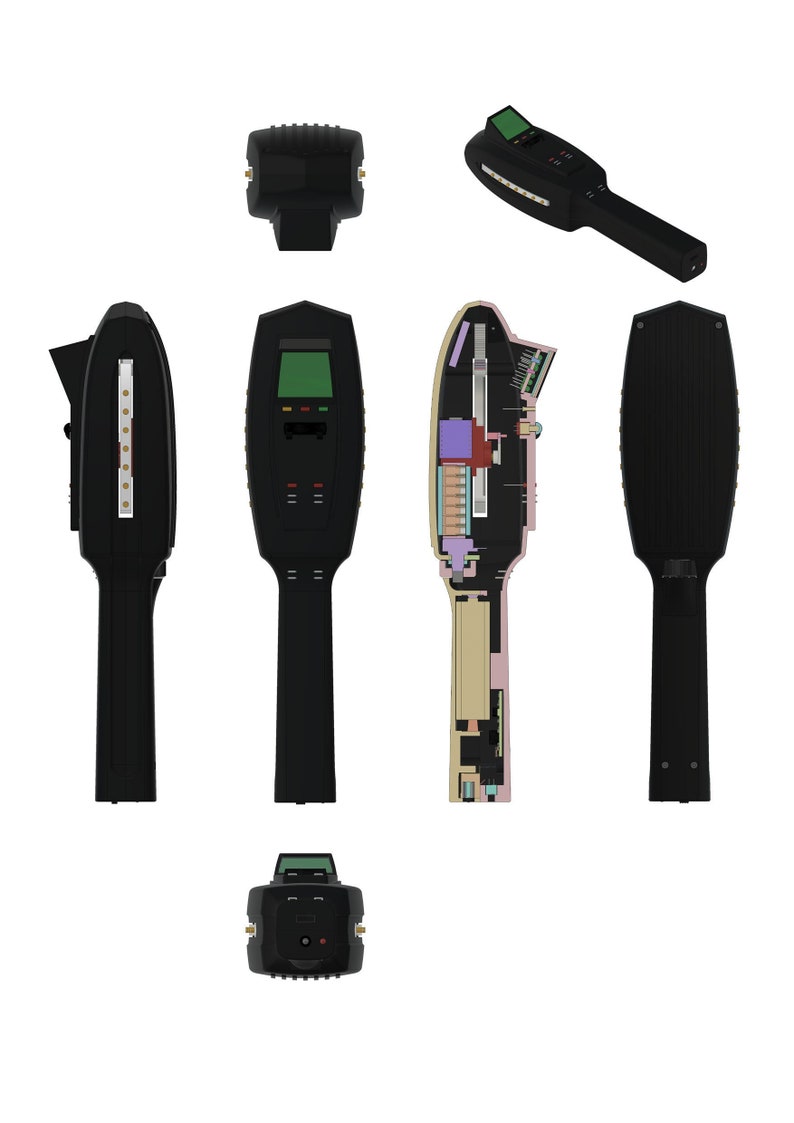
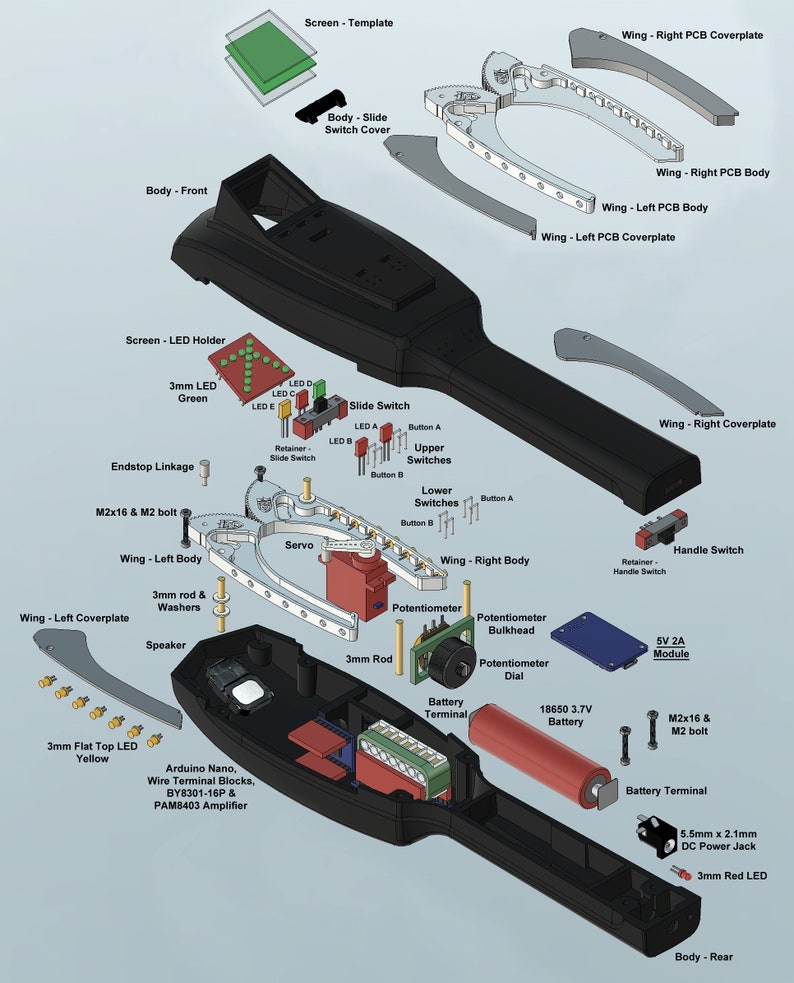
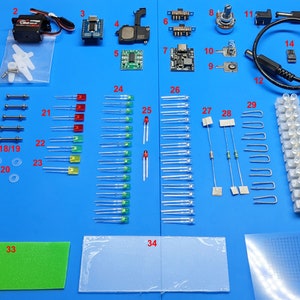
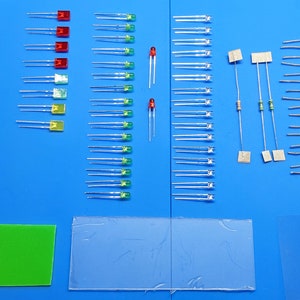
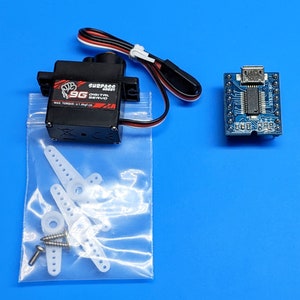
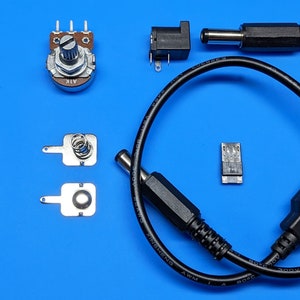
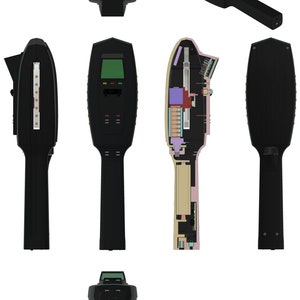
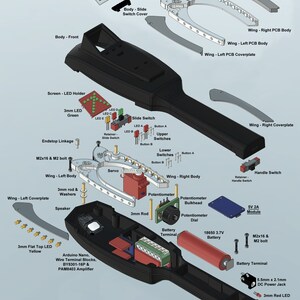
PKE Meter - GB1 Hero IONA Version - Electronic Components & Digital Files
Vendedor estrella
Los vendedores estrella tienen un excelente historial probado de experiencia de cliente: reciben reseñas de 5 estrellas de cada pedido, envían con puntualidad y responden rápido a los mensajes que reciben.
Solo puedes hacer una oferta por compras de un único artículo
Vendedor estrella. Este vendedor recibió sistemáticamente reseñas de 5 estrellas, envió los pedidos de manera puntual y respondió rápidamente a los mensajes que recibió.
-
Pídelo hoy para recibirlo en torno al 21 may-25 jun
Tu pedido debería llegar en torno a esta fecha si lo compras hoy. Para calcular una fecha de entrega estimada fiable, nos fijamos en detalles como los tiempos de tránsito más recientes de la compañía de transporte, el tiempo de preparación del vendedor y su historial de envíos, y desde dónde y a dónde se envía el pedido.
-
No se aceptan cambios ni devoluciones
Ponte en contacto conmigo si tienes problemas con tu pedido.
-
Envío gratis
-
Se envía desde: Reino Unido
Ha habido un problema al calcular los gastos de envío. Vuelve a intentarlo.
Protección de compras de Etsy
Compra con confianza en Etsy sabiendo que estamos a tu lado si surge un problema con un pedido que reúne los requisitos.
Consulta las condiciones del programa

113 reseñas
5 de 5 estrellasExcelente servicio definitivamente lo usaré nuevamente.
Artículo comprado:
PKE Meter - GB1 Hero IONA Version - Electronic Components & Digital FilesGary 03 abr 2024
Impresionante colección de piezas y los STL son perfectos. La guía es un poco aproximada, pero podría deberse a que soy un poco nuevo en esto. ¡Muchas gracias!
Artículo comprado:
PKE Meter - GB1 Hero IONA Version - Electronic Components & Digital Files
Anthony Clark 21 ene 2024
Réplica muy bien elaborada y bien investigada del accesorio utilizado en la pantalla. Instrucciones claras, muy fáciles de seguir.
Artículo comprado:
PKE Meter - GB1 Hero IONA Version - Electronic Components & Digital FilesHarley Gant 23 oct 2023
Fotos de las reseñas