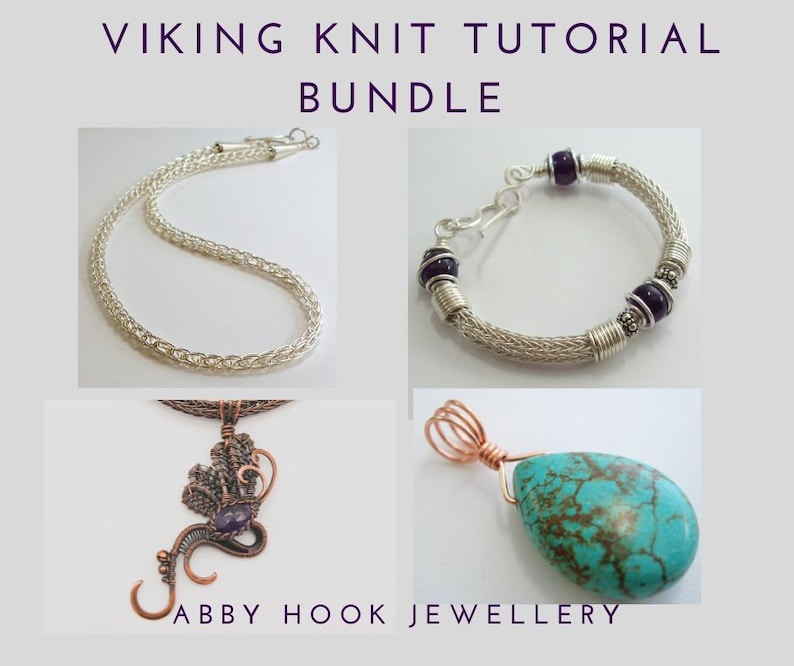
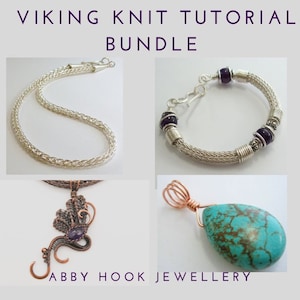
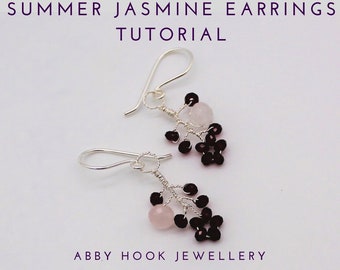
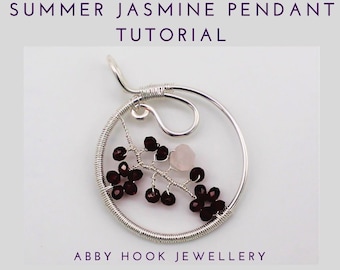
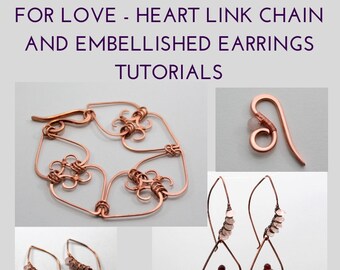
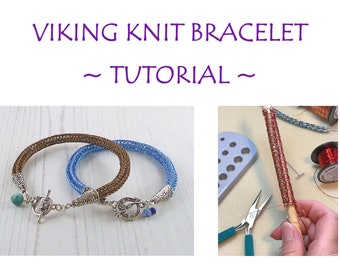
Learn to make Viking knit chain and then develop the technique to form Double knit chain in the Torcesque bracelet. Once you have mastered both the single and double knit, take the technique further, using it as a decoctive space filler and to form a bezel setting around a stone in the Odonata Dragonfly tutorial. Bonus tutorial included - 3 wire Wrapped Bail, suitable to use with this type of chain, so that you can make your own pendants. These detailed wire jewellery tutorials are in 4 pdf files with instant download.
The tutorials also include instructions for making many jewellery components, including clasps, end caps, cones and bead cages as well as wrapped links.
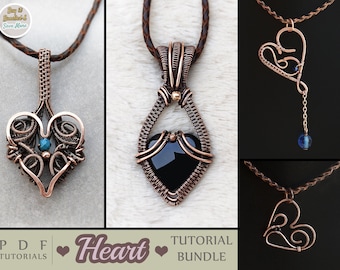
This bundle includes 4 tutorials, links and details below:
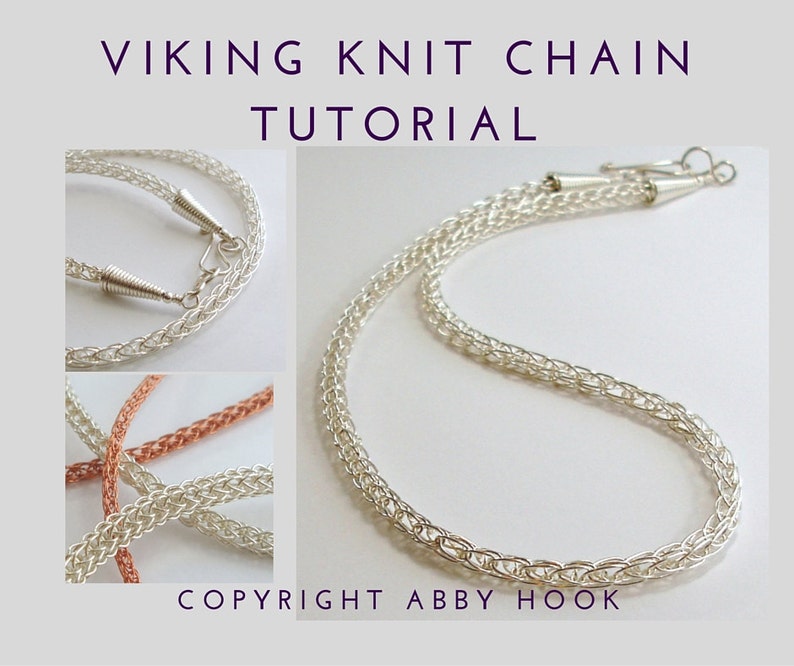
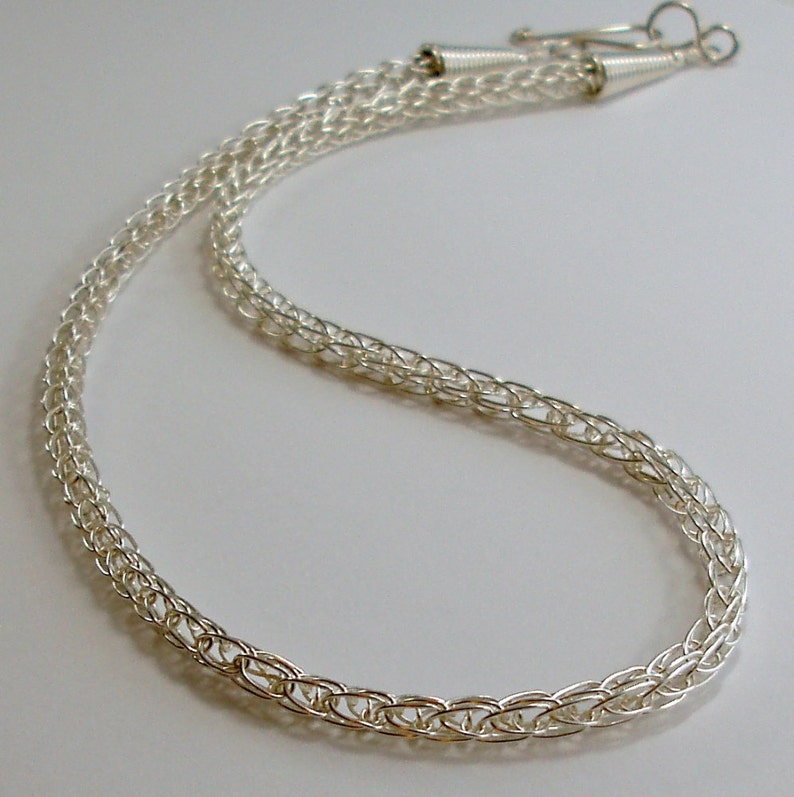
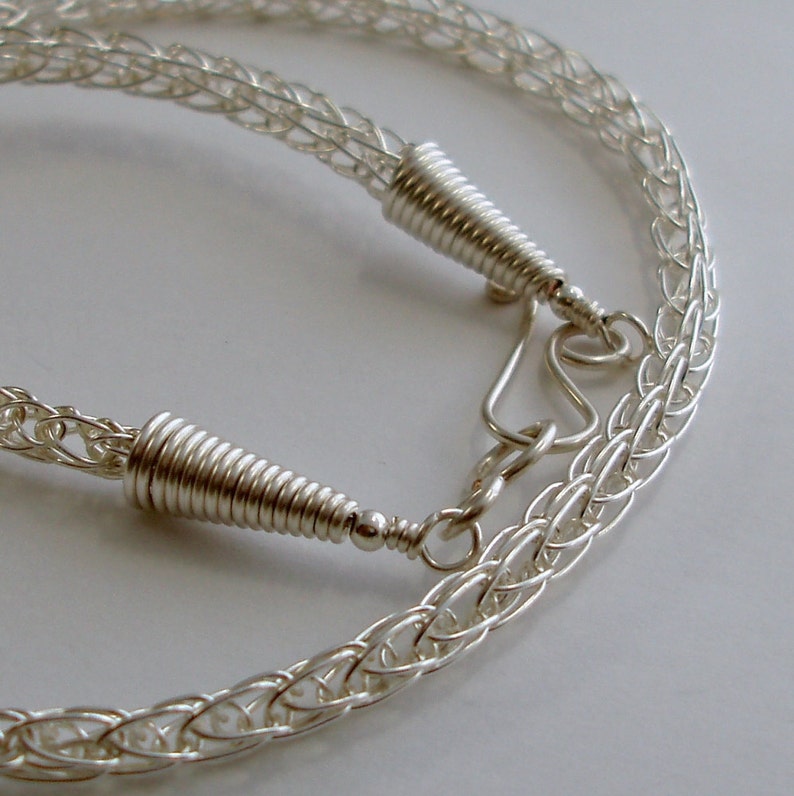
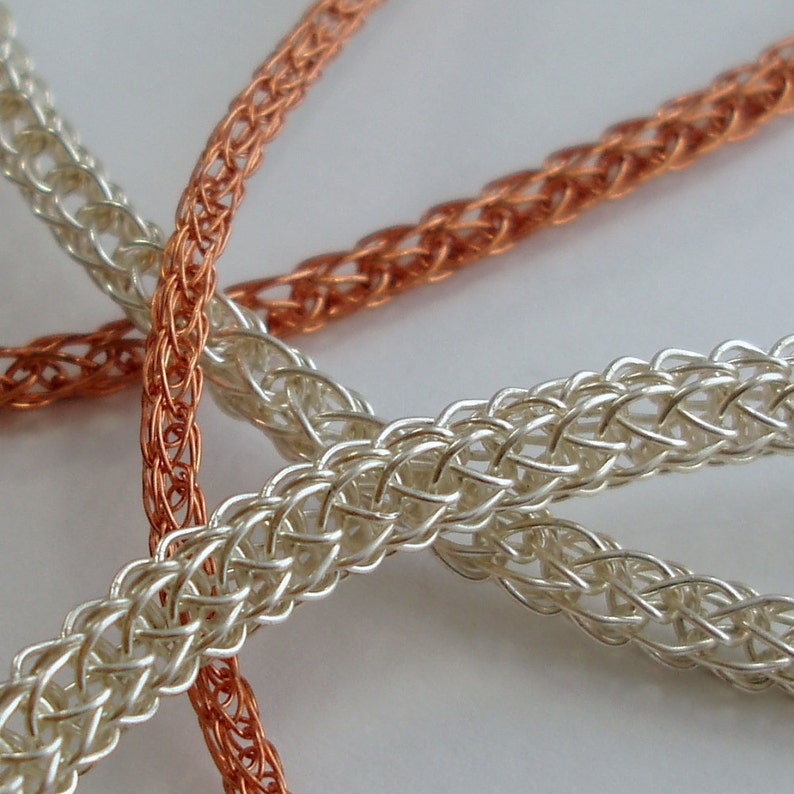
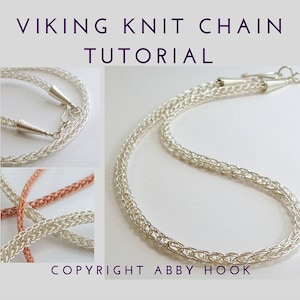
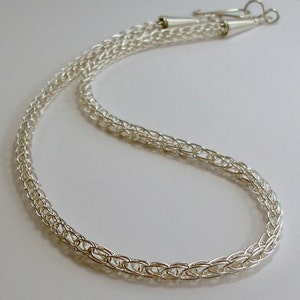
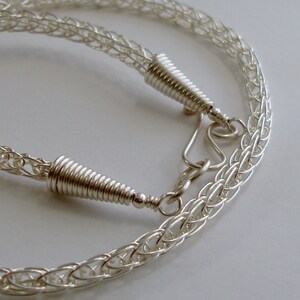
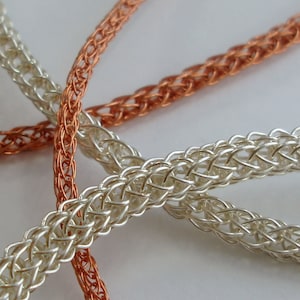
Viking knit Chain
https://www.etsy.com/uk/listing/82509640/viking-knit-chain-wire-jewelry-tutorial
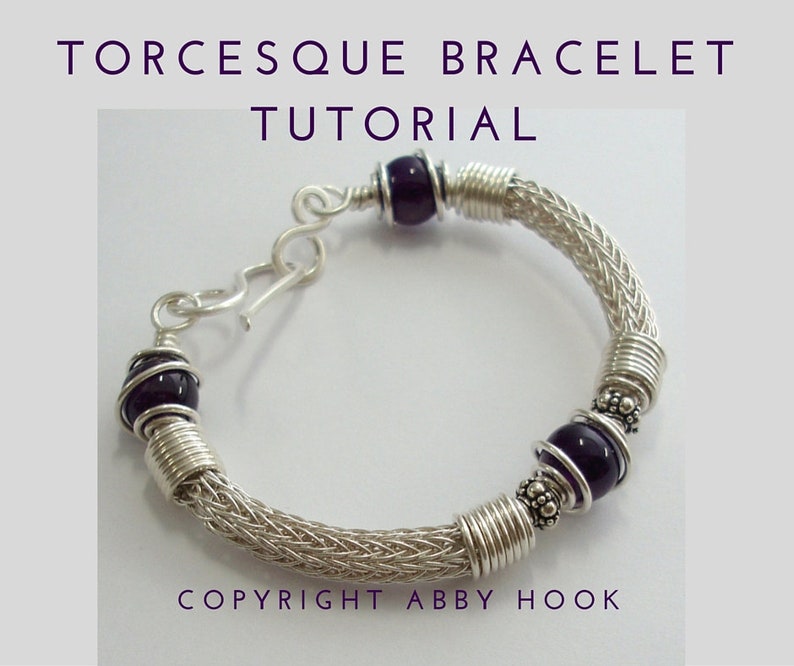
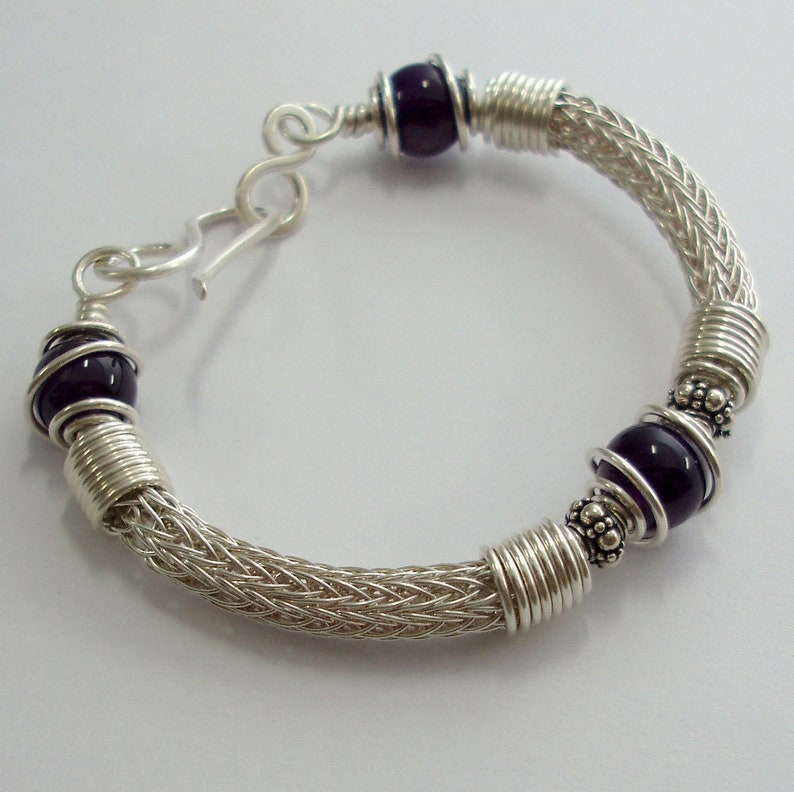
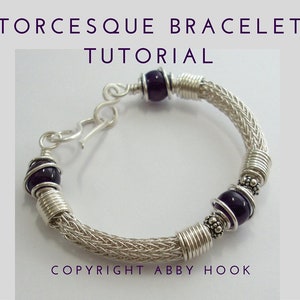
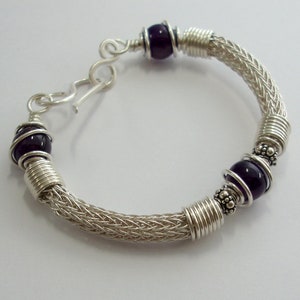
Torcesque Bracelet
https://www.etsy.com/uk/listing/155439009/torcesque-bracelet-wire-jewelry-tutorial
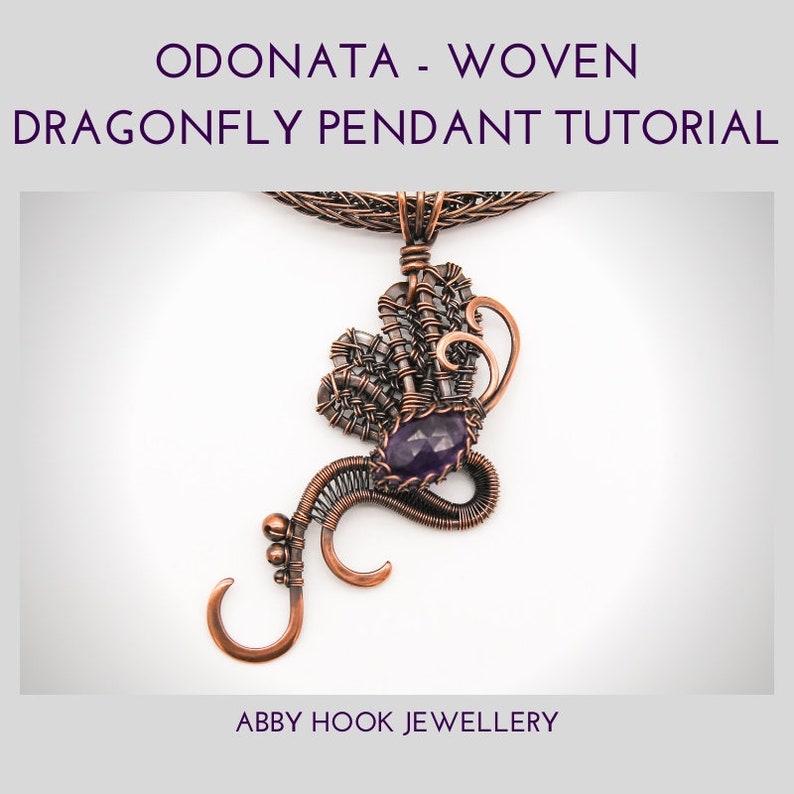
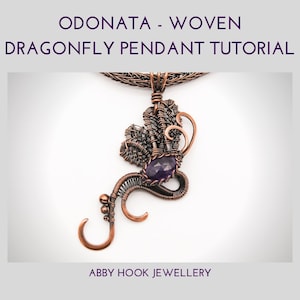
Odonata Woven Dragonfly Pendant
https://www.etsy.com/uk/listing/772366868/wire-jewelry-tutorial-odonata-woven
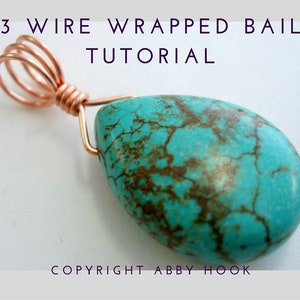
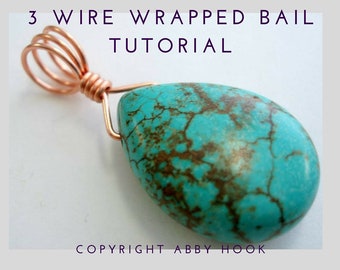
3 Wire Wrapped Bail
Bonus tutorial
Viking knit Chain
Level: Intermediate
Page count: 22
Number of Steps: 24
This chain was actually used by the Vikings thousands of years ago (8th to 10th century) as currency, where they cut the chain to the desired length. Nowadays it is enjoyed as a very attractive, strong and flexible chain.
This tutorial not only shows you how I form the chain, it also includes comprehensive instructions on how to attach a new wire, so that it is not only securely held in place, but the join is almost invisible. It also shows you how to finish the chain, securing the end in place. How to form a wire cone to use as a very attractive end cap as well as forming a hook clasp, figure of 8 tapered link and a wrapped link. I have also included a detailed sizing chart, to help you calculate not only the length of wire you require for different sized chains but also the starting and finishing lengths of chain prior and after pulling through the draw plate.
The materials list below is based on the 18” chain shown in the tutorial, the required length of 24 gauge wire will vary depending on the length and style of Viking knit you make.
Materials:
• Up to 260” 24 gauge soft round wire
• 10” 20 gauge soft round wire
• 20” 18 gauge soft round wire
• 4” 16 gauge soft round wire
• 2 x 3mm round metal beads (with at least a 0.8mm hole)
Tools:
• Chain nose pliers
• Round nose pliers
• Wire cutters
• Flat nose pliers
• Nylon jaw pliers
• Viking knit draw plate
• 9mm mandrel (or mandrel of your choice)
• Tape measure
• Needle or pin
• Masking tape
Torcesque Bracelet
Learn to make this Viking and Celtic inspired bracelet using wire and a variety of techniques with this detailed wire jewelry tutorial in a pdf file with instant download. Combining the ancient art of Viking knit with the robust look of the torcs of the Icini tribes, this bracelet makes a real statement!
Level: Advanced
Page Count: 43
Number of Steps: 38
This design combines many techniques and components, that can be used for different applications in your jewellery making, including:-
• Double Viking knit
• Forming a bead cage
• Creating wire end caps
• Forging a hook clasp and link
• Forming a core wire for a bracelet
As well as the main design, included at the end of this tutorial are details for wire lengths required for different sizes beads, attaching a new wire to the weave with an invisible join and some variations on the design.
This is an advanced tutorial with 38 steps for the main tutorial and 4 pages of details on variations,with a total of 43 pages with over 120 clear, crisp colour photos detailing every step, and packed with tips and tricks, making the instructions very easy to follow.
Although I have classed this as an advanced design, due mainly to the length of wire you will be working with as well as the amount of components involved, a confident intermediate student will have no problem completing it. The techniques and design are taught in their entirety, leaving no room for guesswork. However, previous experience of single Viking knit will be an advantage.
Please read through the tutorial in its entirety at least once before starting, to familiarize yourself with the process.
Materials:
• 4 1/2” of 12 gauge soft round wire
• 10 ½” of 16 gauge soft round wire
• 47” of 18 gauge soft round wire
• 130” of 24 gauge soft round wire
• 3 x 10mm round beads (with a hole size of at least 1.2mm)
• 2 x rondelle beads (6 – 7mm)
• Scrap 24 gauge wire (in 5 pieces 2 x 13” and 3 x 3” at least)
Tools:
• Chain nose pliers
• Round nose pliers
• Flush Wire cutters
• Flat nose pliers
• Nylon jaw pliers
• Viking knit drawplate
• 12mm mandrel
• 6mm mandrel
• Oval bracelet mandrel
• Bench block/anvil
• Chasing hammer
• Rawhide mallet
• Needle/pin
• Tape measure
• Flat needle file
• Sanding pads – 3 grits, 180, 220 and 280
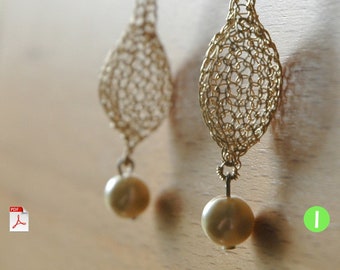
Odonata Woven Dragonfly Pendant
Wire Jewelry tutorial, learn to make this dragonfly pendant in this detailed, step by step pattern. You can download the pdf file instantly after purchase!
Level: Advanced
Page count: 33
No of steps: 35
This flowing, whimsical design is packed with detail and a variety of techniques that can be used in any of your designs. The contrast of the thick, hammered wire against the delicately woven, knitted and knotted wire creates interesting detail.
Some of the techniques to be covered include:
• Stone setting using a Viking knit bezel, capture a stone securely in knitted wire
• Shaping/cold forging heavy gauge wire into a flowing frame
• Hammering wire
• Filing and sanding
• Weaving with wire
• Attaching beads to a frame wire securely
• An adaptation of the Viking knit weave to create a detail that is visually similar to the Turks head knot
As with any written instruction, please read through at least once before starting.
Materials:
• 14” 14 gauge soft round wire
• 6” 16 gauge soft round wire
• 84” 24 gauge soft round wire
• 100” 28 gauge soft round wire
• 1 x 2mm round metal beads
• 1 x 3mm round metal beads
• 1 x 4mm round metal beads
• 1 x stone approx. 25mm x 10mm elongated pear, smooth or faceted
Tools:
• Round nose pliers
• Flat nose pliers
• Chain nose pliers
• Nylon jaw pliers
• Flush cutters
• Chasing hammer
• Bench block/anvil
• Files
• Sanding pads (ideally 3 grits)
• Tape measure
• Pin
• Marker pen
3 Wire Wrapped Bail Tutorial
Level: Beginner
Page count: 13
Number of steps: 19
This simple bail, formed from a single piece of wire, is quick to make and very versatile.
It can be used for any top drilled stone, donut or as the finishing touch for a pendant.
Due to the large loops this design is particularly useful is you are using a chunky chain like Viking knit, chain maille or a multi strand necklace, as the bail allows free movement of the pendant.
The main tutorial teaches you how to make the bail for a front, top drilled stone, also included are 2 variations, the first is for a side drilled or drop stone and the second shows you how to wrap a donut, including instructions on how to calculate the length of wire required.
Please read through the instructions at least once before starting.
Materials:
• 8” 18 gauge soft, round wire
• 1 top drilled focal bead, drop, donut or pendant
Tools:
• Chain nose pliers
• Round nose pliers
• Wire cutters
• Flat nose pliers
• Nylon jaw pliers
• 8mm mandrel (wooden dowel, pen, knitting needle or similar)
• Tape measure
Once ordered and paid for the tutorial will be available for download. You will be sent an email to the address associated with your Etsy account, with a link to the file. If you no longer use that email address you will still be able to access and download the files from your Purchases or Receipt page.
Note to EU customers - The European Union implemented new rules on value-added tax (VAT) for digital items earlier this year. The rules, which took effect on January 1, 2015, state that VAT on digital items delivered via automatic download will be taxed based on the country where the buyer is located, not where the seller is located. The rules apply to any shop selling digital items that can be automatically downloaded at the time of purchase to buyers in the EU, no matter where the shop is located. To be clear, EU buyers – not Etsy or Etsy sellers – will be paying VAT as part of their total purchase price.
Please see my terms and conditions for use of tutorials.
To see all of my tutorials currently available, follow this link:
https://www.etsy.com/uk/shop/Abbyjewellery?ref=seller-platform-mcnav§ion_id=5933374
For tutorial discount packs:
https://www.etsy.com/uk/shop/Abbyjewellery?ref=seller-platform-mcnav§ion_id=14202847
For all items in my shop:
https://www.etsy.com/uk/shop/Abbyjewellery