
COSMETOLOGY Arched Satin Outline Embroidery Two Sizes 6x10 and 7x12 Hoop
Item highlights
Seller's description
Arched satin stitch outline embroidery design for those in the COSMETOLOGY field. The satin stitch on this design is narrow and will not allow for applique fabric to be added, so please do not purchase if you are wanting an applique design.
This listing includes two sizes:
6x10 hoop - 6 1/8 x 10 3/16 inches with 35,947 stitches
7x12 hoop - 7 1/16 x 11 13/16 inches with 41,545 stitches
This is not a patch. No physical product will be sent to you. This is an embroidery file and you must have an embroidery machine to use this product.
Available in PES, DST, EXP, HUS, JEF, VP3, and XXX.
This design may be used to decorate items for personal use or for sale, however the actual design may not be copied, sold, reproduced, or shared in any way. That is a violation of copyright laws.
This is a digital file available for immediate download. I cannot offer refunds on digital designs. If there is an issue with the stitched design, please let me know and I will do my best to correct your issue.
Where hoop sizes are mentioned, I am referring to the following hoop sizes:
Hat (60mm x 130mm)
4x4 (100mm x 100mm)
5x7 (130mm x 180mm)
6x10 (160mm x 260mm)
8x8 (200mm x 200mm)
7x12 (180mm x 300mm)
8x12 (200mm x 300mm)
9.5x14 (240mm x 360mm)
10.5x16 (272mmx460mm)
APPLIQUÉ INSTRUCTIONS:
Fabric Prep: Appliqué fabric should be washed and dried prior to using so that it’s preshrunk. Also, I recommend applying heat n bond lite to the back of the fabric, then peel off the paper backing before placing the material on your embroidery project. Do not apply heat n bond lite for raggy edge applique.
Appliqué files have three steps and you need to keep the thread colors different for these three steps so your machine will stop (single needle machine). Even if you don’t change the thread on the machine, the different colored thread in the design will force the machine to stop.
Step 1 Placement: Place your hooped project on the machine and run the first color. This is the placement stitch to show where to lay the fabric.
Step 2 Tackdown: Lay your fabric over the placement stitch and run the second stitch. This is the tackdown stitch to hold the fabric in place. For raggy edge applique, I recommend adding a piece of flannel in addition to the fabric you are using. Flannel frays very easily and adds more dimension to the raggy edge.
Step 3 Finishing Stitch: Remove the hoop from the machine, but DO NOT unhoop your project. Trim the appliqué fabric as close to the stitches as possible without cutting into the stitches. For raggy edge applique, trim the fabric leaving approximately 1/4 inch of fabric past the stitches. Place the hoop back on the machine and run the third and final step which is the edge stitch or finishing stitch.
For designs with two different fabrics, the order is usually bottom layer placement stitch, bottom layer tackdown stitch, top layer placement stitch, top layer tackdown stitch, bottom layer edge stitch, top layer edge stitch. Trim fabric after each tackdown stitch before proceeding to the edge stitch.
Happy Stitching!
Price:$5.00
You can only make an offer when buying a single item
Delivery
Instant download
Your files will be available to download once payment is confirmed. Here's how.
Instant download items don't accept returns, exchanges or cancellations. Please contact the seller about any problems with your order.
Reviews for this item

Stitched out nicely. My project turned out beautifully.
Photos from reviews
Seller's description
Specifications

Arched satin stitch outline embroidery design for those in the COSMETOLOGY field. The satin stitch on this design is narrow and will not allow for applique fabric to be added, so please do not purchase if you are wanting an applique design.
This listing includes two sizes:
6x10 hoop - 6 1/8 x 10 3/16 inches with 35,947 stitches
7x12 hoop - 7 1/16 x 11 13/16 inches with 41,545 stitches
This is not a patch. No physical product will be sent to you. This is an embroidery file and you must have an embroidery machine to use this product.
Available in PES, DST, EXP, HUS, JEF, VP3, and XXX.
This design may be used to decorate items for personal use or for sale, however the actual design may not be copied, sold, reproduced, or shared in any way. That is a violation of copyright laws.
This is a digital file available for immediate download. I cannot offer refunds on digital designs. If there is an issue with the stitched design, please let me know and I will do my best to correct your issue.
Where hoop sizes are mentioned, I am referring to the following hoop sizes:
Hat (60mm x 130mm)
4x4 (100mm x 100mm)
5x7 (130mm x 180mm)
6x10 (160mm x 260mm)
8x8 (200mm x 200mm)
7x12 (180mm x 300mm)
8x12 (200mm x 300mm)
9.5x14 (240mm x 360mm)
10.5x16 (272mmx460mm)
APPLIQUÉ INSTRUCTIONS:
Fabric Prep: Appliqué fabric should be washed and dried prior to using so that it’s preshrunk. Also, I recommend applying heat n bond lite to the back of the fabric, then peel off the paper backing before placing the material on your embroidery project. Do not apply heat n bond lite for raggy edge applique.
Appliqué files have three steps and you need to keep the thread colors different for these three steps so your machine will stop (single needle machine). Even if you don’t change the thread on the machine, the different colored thread in the design will force the machine to stop.
Step 1 Placement: Place your hooped project on the machine and run the first color. This is the placement stitch to show where to lay the fabric.
Step 2 Tackdown: Lay your fabric over the placement stitch and run the second stitch. This is the tackdown stitch to hold the fabric in place. For raggy edge applique, I recommend adding a piece of flannel in addition to the fabric you are using. Flannel frays very easily and adds more dimension to the raggy edge.
Step 3 Finishing Stitch: Remove the hoop from the machine, but DO NOT unhoop your project. Trim the appliqué fabric as close to the stitches as possible without cutting into the stitches. For raggy edge applique, trim the fabric leaving approximately 1/4 inch of fabric past the stitches. Place the hoop back on the machine and run the third and final step which is the edge stitch or finishing stitch.
For designs with two different fabrics, the order is usually bottom layer placement stitch, bottom layer tackdown stitch, top layer placement stitch, top layer tackdown stitch, bottom layer edge stitch, top layer edge stitch. Trim fabric after each tackdown stitch before proceeding to the edge stitch.
Happy Stitching!
-
Designed by
-
Item typeDigital download
-
Digital file type(s)1 ZIP
If something goes wrong with an order, we've got your back on all eligible purchases. View program terms
Meet your seller

Usually responds in a few hours
Rave reviews Average review rating is 4.8 or higher.
More from this shop
-

Digital download
NURSE Arched Satin Applique Embroidery Nursing Nurses Design Four Sizes 5x7, 6x10, 8x8, and 8x12 Hoop
$5.00
-

Digital download
Teacher Arched Satin Applique Embroidery Design Satin Stitch Four Sizes 6x10, 8x8, 7x12, and 8x12 Hoop
$5.00
-

Digital download
RN Registered Nurse Satin Applique Embroidery Satin Script Nursing Five Sizes 5x7, 8x8, 6x10, 7x12 and 8x12 Hoop
$5.00
-

Digital download
TEACH Arched Satin Applique Embroidery Teacher Design Five Sizes 5x7, 8x8, 6x10, 7x12, and 8x12 Hoop
$5.00
-

Digital download
CNA Block Applique Embroidery Certified Nurse Assistant Satin Script Nursing Six Sizes 5x7, 8x8, 9x9, 6x10, 7x12 and 8x12 Hoop
$5.00
-
Digital download
Nursing Satin Stitch Embroidery Nurse Word Art Six Sizes 4, 5, 7, 8, 10, and 12 Inches Wide
$5.00
-

Digital download
Cosmetology PNG, Blue Bow Cosmetologist Sublimation Design, Printable Cosmetology Shirt Graphic, Salon Worker Gift, DTF & Sublimation PNG
$3.99
-

Digital download
Cosmetology Instructor Svg - Beauty School Design, Professional Trainer Cut File, Sublimation Png Eps for Cricut and Silhouette
$3.31
-

Digital download
Cosmetology Instructor png, Gift for Cosmetology Instructor, Cosmetology Teacher png, Cosmetology Instructor DTF, Beauty School
Sale Price $2.75
Original Price $3.66
-
Digital download
Cosmetology Squad Svg | Beauty School T-shirt | Hair Stylist Svgs | Esthetician Cut Files | Cosmetology School Tshirt | Hair Dresser Pngs
$4.50
-
Digital download
Cosmetologist Svg Dxf Cut Files, Cosmetologist Png, Cosmetology Svg Files For Cricut, Hairdresser Svg Block Text Sublimation Digital Designs
Sale Price $1.99
Original Price $3.99
-

Digital download
Cosmetologist SVG PNG, Cosmetologist Svg, Makeup Svg, Hairdresser Svg, Hairstylist Svg, Hair Stylist Svg, Cosmetology Svg, Lash Artist Svg
Sale Price $2.49
Original Price $2.76
-
Digital download
Cosmetology PNG Beige Skin Care Therapist Sublimation Beauty Technician PNG Esthetician Shirt Design Preppy Beautician PNG Cosmetologist Png
Sale Price $2.49
Original Price $4.14
-
Digital download
Cosmetology Crew Svg, Beauty School T-shirt Svgs, Hair Stylist Pngs, Esthetician Cut Files, Cosmetology School Tshirt Svgs, Hair Dresser Png
$4.50
-

Digital download
Cosmetologist In Training Svg, Future Cosmetologist Svg, Cosmetology Student Svg, Beauty School Svg, Hairstylist Student Svg Cricut Cut File
Sale Price $1.99
Original Price $3.99
-
Digital download
Hairstylist embroidery design file, hair icons embroidery designs, – Salon Machine Embroidery – Digital Download
$7.00
-
Digital download
In My Cosmetology School Era SVG and PNG, Hairdresser and Hair Stylist Png and Svg Cosmetology Png and Svg
$2.99
-

Digital download
Small Town Cosmetologist SVG PNG, Cosmetologist Svg, Hairdresser Svg, Makeup Svg, Cosmetology Svg, Cosmetologist Mode Svg, Beautician Svg
Sale Price $2.89
Original Price $4.13
Shoppers with similar taste loved these
-

Nail Tech Sweatshirt: Cotton Polyester Mix, Size S-3XL
Sale Price $26.99
Original Price $35.99
-
Personalised Nail Technician Keyring - Thank You Gift, Present for Nail Tech, Graduation
Sale Price $9.06
Original Price $10.07
-
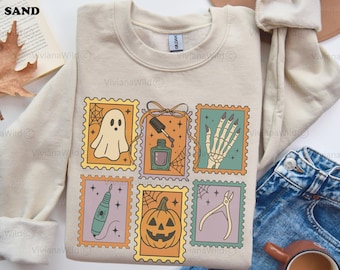
Nail Tech Halloween Sweatshirt Spooky Nail Tech Crewneck Nail Artist Gift Pumpkin Ghost Nail Artist Stamp Manicurist Gifts Nail Boss Sweater
Sale Price $28.80
Original Price $36.00
-

Nail Tech Sweatshirt, Gift For Nail Tech, Nail Salon Sweater, Nail Artist Gift, Nail Technician,Nail Salon Gift,Manicurist Appreciation Gift
Sale Price $8.99
Original Price $14.98
-

Retro Nail Tech Shirt • Nail Artist Tshirt • Nail Technician Gifts • Gift for Nail Artist • Cosmetologist Graduation Tee • Manicurist Tshirt
Sale Price $21.65
Original Price $25.47
-
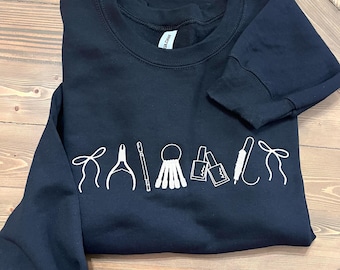
Nail tech artist Icon crewneck| nail tech, nail artist icons sweatshirt | Embroidered Sweatshirt | gifts for nail techs nail art
$40.00
-
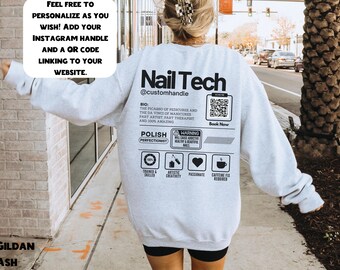
Personalized Nail Tech Sweatshirt Custom QR Code Design Nail Artist Gift Nail Technician Shirt Future Nail Tech Sweater Nail Tech apparel
Sale Price $49.35
Original Price $65.80
-

Nail Tech Sweatshirt, Nail Tech Gift, I'm the Nail Tech They Told You About, Nail Technician Shirt, Nail Tech Crewneck Sweater
Sale Price $13.99
Original Price $19.99
-

The Nail Tech Tarot Card Shirt, Nail Technician Skeleton Shirt, Funny Nail Boss Shirt, Nail Artist Shirt, Witchy Tarot Card, Nail Tech Boss
Sale Price $22.40
Original Price $29.87
-

Digital download
Nail Tech definition print, Nail Tech gifts, Nail Technician gifts, Nail Salon Wall Decor, Beauty room prints, Nail Art, Nail printable
Sale Price $6.00
Original Price $9.22
-
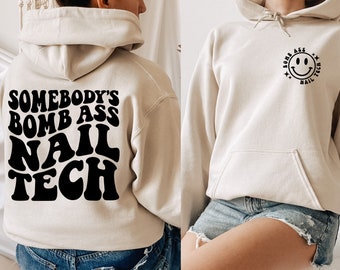
Retro Nail Tech Hoodie: Somebody Bomb Front & Back Print
Sale Price $19.80
Original Price $49.50
-
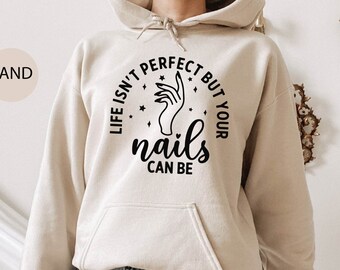
Life Isn't Perfect But Your Nails Can Be Sweatshirt, Nail Art Sweatshirt, Salon Owner Gift, Nail Tech Sweatshirt, Nail Stylist Sweatshirt
Sale Price $19.99
Original Price $33.32


Looking for more? Find it on Etsy