


Price: $13.48
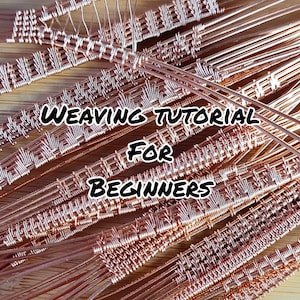
Cross - Step by Step Tutorial - pure wire-wrapping, no soldering skills needed - instant download
Star Seller
Star Sellers have an outstanding track record for providing a great customer experience—they consistently earned 5-star reviews, shipped orders on time, and replied quickly to any messages they received.
You can only make an offer when buying a single item
Star Seller. This seller consistently earned 5-star reviews, shipped on time, and replied quickly to any messages they received.
Instant Download
Your files will be available to download once payment is confirmed. Here's how.
Instant download items don’t accept returns, exchanges or cancellations. Please contact the seller about any problems with your order.
Etsy Purchase Protection: Shop confidently on Etsy knowing if something goes wrong with an order, you'll get a full refund for all eligible purchases — see program terms

1,526 reviews
5 out of 5 stars
I love all if her tutorials she is so talented and this cross was easy to follow, and is coming along beautifully
Nichole Jan 23, 2024
I love the way it is written, but have not yet made one. If you are a collector of tutorials, this is a great one to add to your collection

Linda Pantalone Mar 7, 2023

Photos from reviews
More from this shop


Disclaimer: Etsy assumes no responsibility for the accuracy, labeling, or content of sellers' listings and products. Electrical or electronic products may pose a risk of fire or electrocution. Vintage, handmade, refurbished, or modified electrical or electronic products may not meet current safety standards and may not be in safe working order. Inspect carefully before use and message the seller if you have concerns relating to the product. Do not use a vintage electrical or electronic item if its safety cannot be verified. To reduce the risk of fire, never leave vintage electrical or electronic products plugged in unattended. See Etsy's Terms of Use for more information.