


9 views in the last 24 hours
Price:$18.00
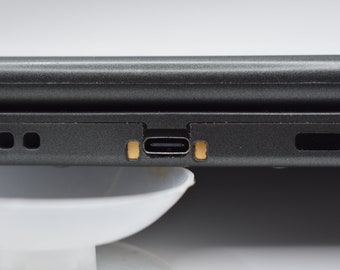
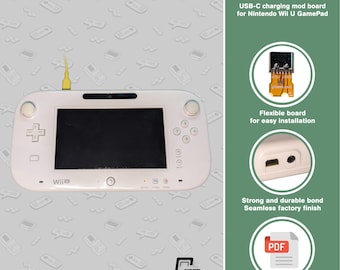
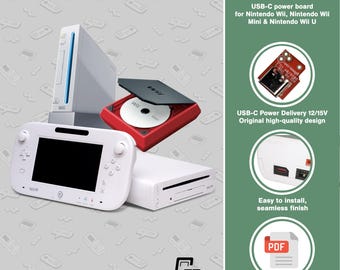
Nintendo Wii U Controller DIY USB-C Replacement charge port w/ Jig+Bezel
Your order should arrive by this date if you buy today. To calculate an estimated delivery date you can count on, we look at things like the carrier's latest transit times, the seller's processing time and shipping history, and where the order is shipping to and from.
Exchanges accepted
You can only make an offer when buying a single item
Highlights
About this mod:
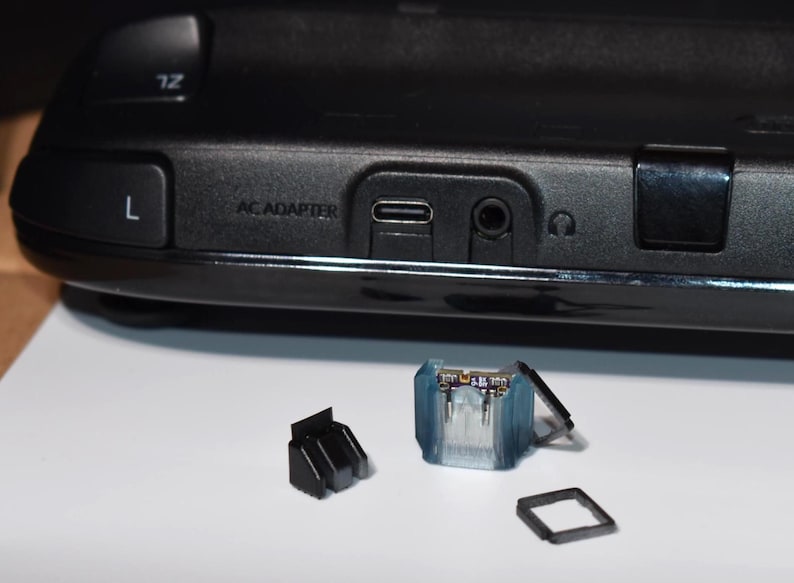
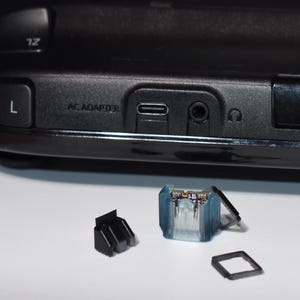
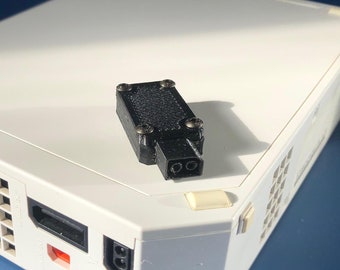
This is a PCB kit to add a USB-C port to the Wii-U gamepad, this usbc port supports usbc to usbc charging as well as usb A to usb C charging. It comes with two 5.1k Ohm resistors to negotiate 5 volt charging with any usbc charger (you don’t have to worry about your charger having too much power/voltage). This kit comes with a bezel to cover the gaps between the case and the USBC port as well as a resin jig for positioning the USBC port on the motherboard.
Mod Difficulty: 8/10, large ground planes require powerful equipment to counteract.
Special considerations:
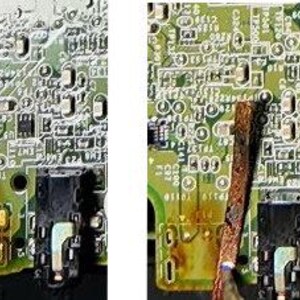
-The Wii-U gamepad has a large ground plane, you will need a powerful soldering iron or a hotplate to preheat the motherboard in combination with a hot air station to remove the old port.
-You will need to solder through the bottom of the of the usbc port so removing the motherboard from the case completely is necessary
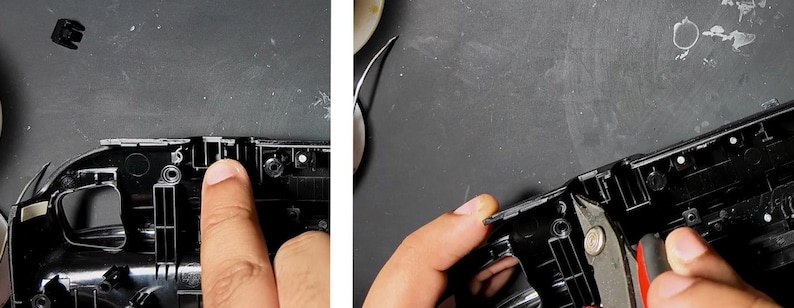
Disassembly/installation:
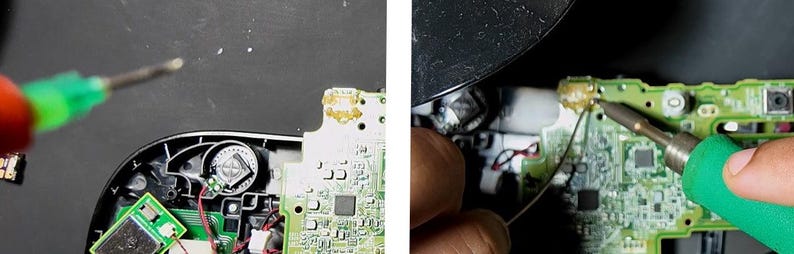
1. Look online for disassembly videos, remove the motherboard from the case completely
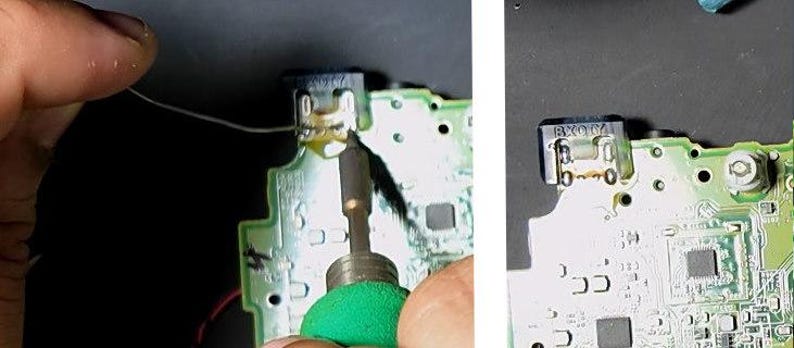
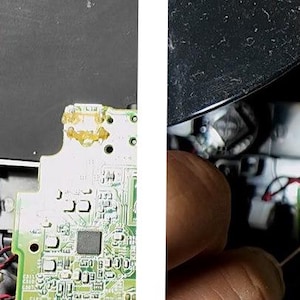
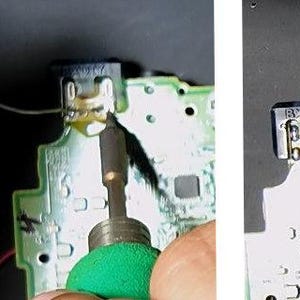
(Preferred) 2: Put the motherboard on a hot plate and heat to 120-140 celsius add flux and low temp solder to the joints of the old charging port. Use a hot air station (300-330 celsius) to heat up the old charging port and remove it.
2: Use your soldering iron (330 celsius) and flux (and low temp solder if owned), to remove the old charging port.
3. Use your soldering iron and solder braid to remove the old solder on the pads the old port was soldered to, your goal is to leave it relatively flat on both sides.
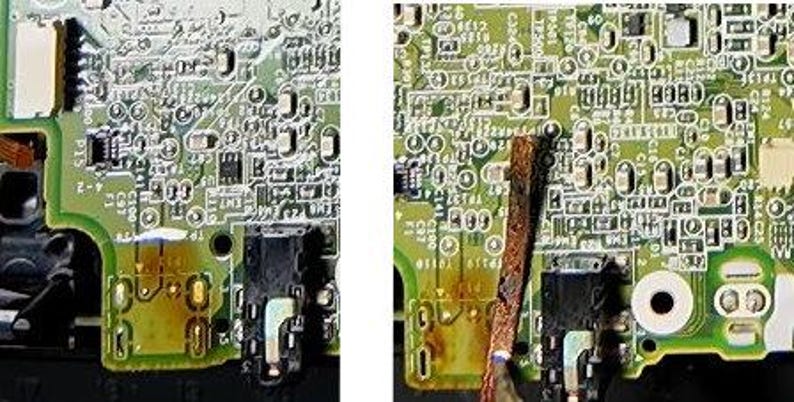
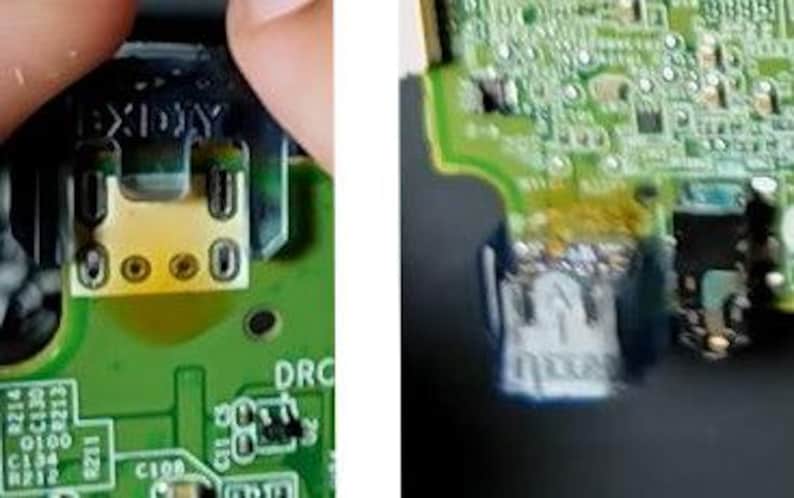
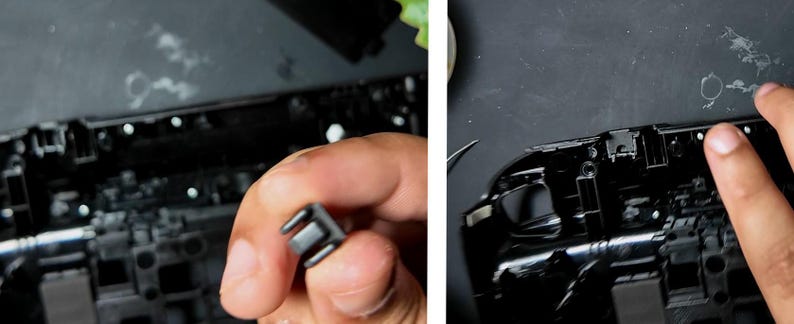
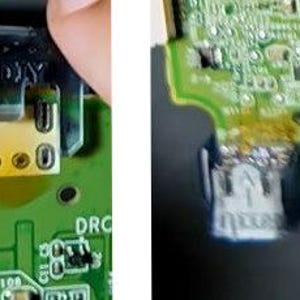
4. Take the positioning jig from the kit and check that it has the kit pcb in it, if it has come out insert the kit pcb back into the jig. Place the jig onto the motherboard such that the ‘wii u’ embossed on the jig is facing the same direction as the top of the old charging port.
(Preferred) 5. Flip the motherboard and place it on the hot plate set at 120-140 Celsius, let it sit for 30 seconds. Add flux to the pads and then hold your soldering iron (330 Celsius) on each pad for ~10 seconds while adding solder.
5. Flip the motherboard, add flux to the pads and hold your soldering iron (330 Celsius) on each pad for ~30 seconds while adding solder.
6. Look at the back of the jig/pcb to see if soldered has flowed up through the two witness holes on the side and the half cut via in the middle. If solder hasn’t flowed through, add more flux and repeat step 5. If it still hasn’t flowed through add more flux and attempt (very carefully) to add solder through the top of the witness holes.
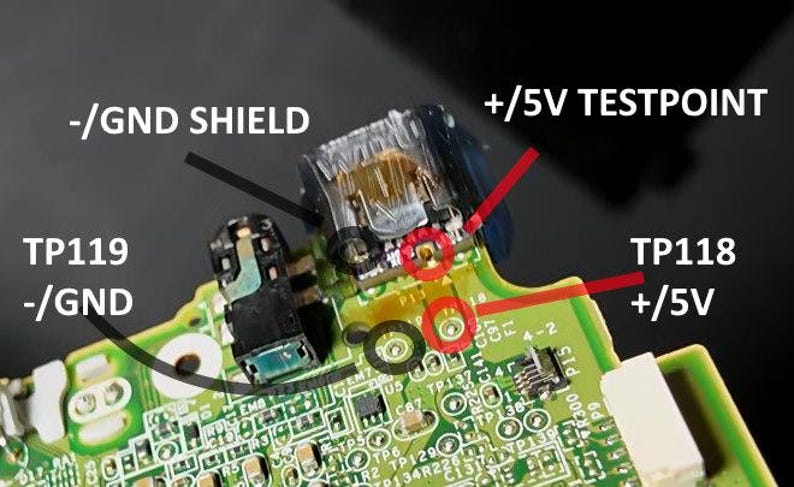
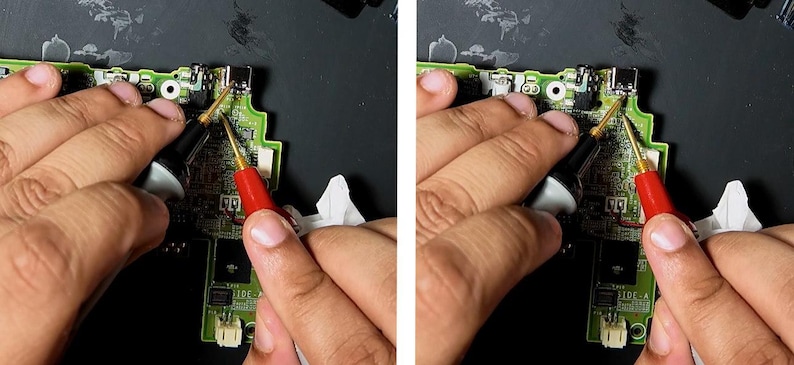
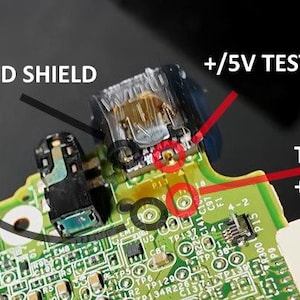
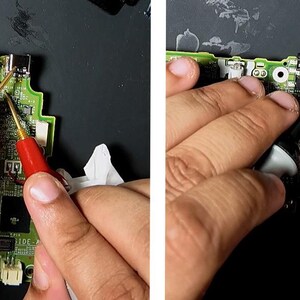
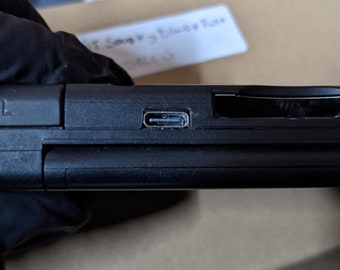
7. Use a multimeter in continuity mode to test if you have a connection between ground on the kit pcb to ground on the motherboard and do them same for 5v. Then use the multimeter in continuity mode to test if you have a short between 5v and ground, there should be no connection between 5v and ground. Refer to the listing pictures for 5v and ground test points on both the kit PCB and motherboard. Remove the jig
Sanding/fitting:
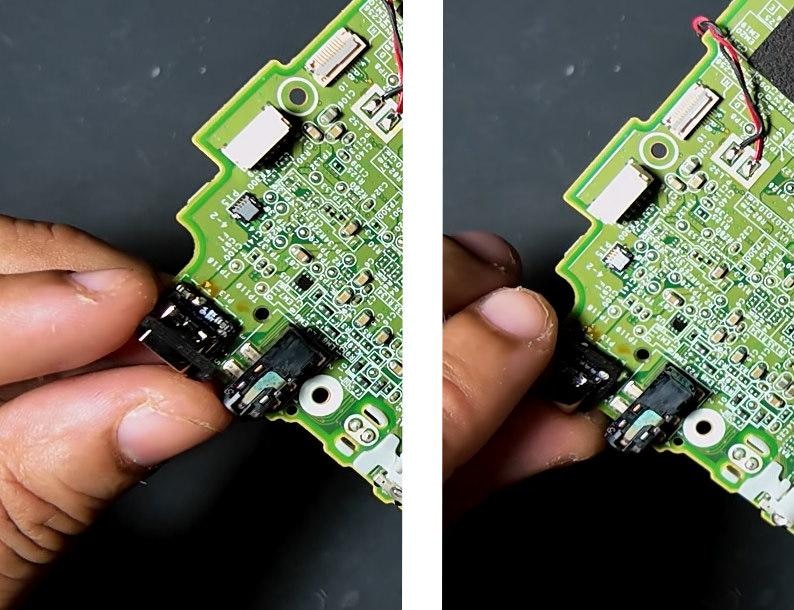
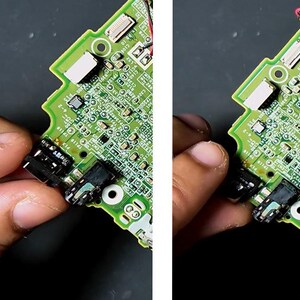
1. Take the square bezel from the kit, the large edge with writing on the top is the topside. Place the large edge under the part of the usbc port hanging over the motherboard. Lever the rest of the square bezel down over the kit usbc pressing it firmly down.
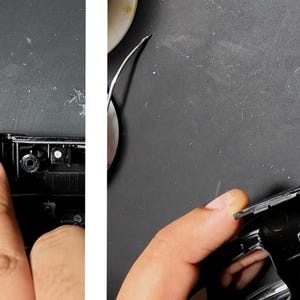
2. Grab the back part of the case for the wiiu gamepad, look at the part of the case that fit over the old charging port. You should see a square bracket with three rectangular sections in the middle, the square bracket comes down to touch the motherboard normally but now the kit pcb blocks it. You will need to trim the bracket down ~2mm to make room for the kit pcb.
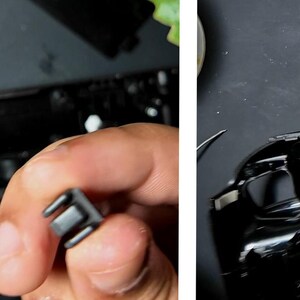
3. Grab the second bezel part from the kit, it looks like 3 triangular shapes with a flat end on top. Place it in the square bracket and press it firmly down, the flat end will block the gap between the case and the top of the kit pcb.
4. Installation steps are done you can do a final continuity check to be extra sure then reassemble the case, make sure not to miss the plastic piece that sat under the motherboard near the charging port. Screw it back together and you’re done.
REQUIRED BUT NOT INCLUDED TOOLS:
1. Soldering Iron
2. Flux
3. Solder
4. Phillips screwdriver (size 0 covers most devices)
5. Tri-wing screwdriver
6. Multimeter with continuity mode
7. Flush Cutters
8.Tweezers
(highly) RECOMMENDED BUT NOT INCLUDED TOOLS:
1. Hot air station
2. Hot plate
INCLUDED:
1. USB-C PCB
2. Resin Installation Jig
3. Black square bezel and black bezel with 3 triangular sections
-
Order today to get by Jun 8-15
Your order should arrive by this date if you buy today. To calculate an estimated delivery date you can count on, we look at things like the carrier's latest transit times, the seller's processing time and shipping history, and where the order is shipping to and from.
-
Exchanges accepted within 30 days
Buyers are responsible for return shipping costs. If the item is not returned in its original condition, the buyer is responsible for any loss in value.
-
Free shipping
-
Ships from: Bronx, NY
There was a problem calculating your shipping. Please try again.
Etsy Purchase Protection
Shop confidently on Etsy knowing if something goes wrong with an order, we've got your back for all eligible purchases —
see program terms

Reviews for this item
Buyer highlights, summarized by AI: Exactly what I wanted · Great product · Fast shipping · Great quality · Would recommend
Just what I needed! Great upgrade for classic system.

Fast shipping, quality parts. Would buy from them again.
Kit works as described. Instructions could be much clearer, though overall it’s fairly straightforward. Wish the plastic holder had a bit more reach to sit fully onto the motherboard, and it’s extremely fragile. Other that that, nice little kit that works as advertised.
instructions kind of difficult to understand but i figured it out, i recommend a heat gun as well as an iron to make things easier.

Rave reviews Average review rating is 4.8 or higher.
More from this shop
Visit shop-
Pro-kit: New Nintendo 3DS XL (and original) USBC ports (retain cradle charging)
$22.00
-

Nintendo 3DS and 3DS XL USB-C Replacement charge port w/ Jig+bezels
$18.00
-
Nintendo DS Lite USB-C Replacement charge port w/ Jig+Bezel -USBC diy kit V2
$18.00
-

USB-C charge port mail-in service for 3DS/3DSXL/N3DS/N3DSXL/DSL/2DS/2DSXL/DSi/DSiXL/WiiU/VITA1K/VITA2K
$75.00
-
Nintendo Wii U GamePad: USB-C Mod
$15.66
-
Custom Nintendo Wii U USB Type C Power Delivery Adapter Charger Mod
$37.00
-
Nintendo Wii: Power Board USB-C Mod
$19.28
-
Custom Nintendo Wii USB Type C Power Delivery Adapter Charger Mod
$37.00
-
Dolphin Materia (Nintendo Gamecube USB-C PD Power Cable) DOL-MAKO12V
$67.45
-
Super Mario Maker Vintage Nintendo Wii U Game Complete Tested and Working
$19.99
-

Nintendo Wii U Authentic Video Game Collection (A-L)
$15.99
-
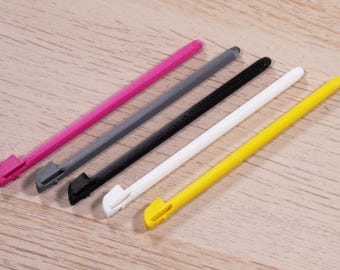
Nintendo Wii U Replacement Stylus - 5 Pak 3D Printed
$6.75
-

Custom Nintendo Gamecube USB Type C Power Delivery Adapter Charger Mod
$37.00
-
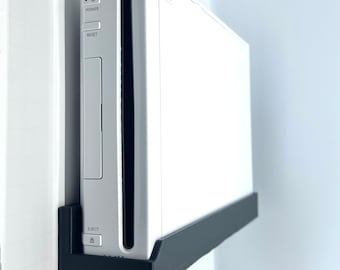
Wii Console Mount (SCREWS INCLUDED)
$24.99
-
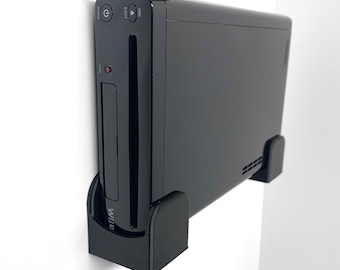
Wii U Console Wall Mount (SCREWS INCLUDED)
$24.99
-
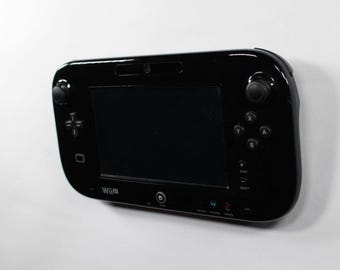
Wall Mount for Wii U Controller
$5.99
Disclaimer: Etsy assumes no responsibility for the accuracy, labeling, or content of sellers' listings and products. Electrical or electronic products may pose a risk of fire or electrocution. Vintage, handmade, refurbished, or modified electrical or electronic products may not meet current safety standards and may not be in safe working order. Inspect carefully before use and message the seller if you have concerns relating to the product. Do not use a vintage electrical or electronic item if its safety cannot be verified. To reduce the risk of fire, never leave vintage electrical or electronic products plugged in unattended. See Etsy's Terms of Use for more information.


