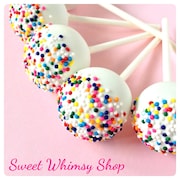


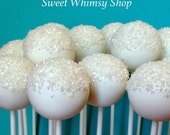
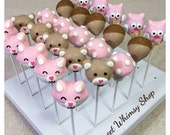


Scratch-baked, hand-sculpted cake pops. Tiny, tasty art...on a stick! :)
Over Christmas break (from my career as a middle school art teacher) in 2010, I purchased Angie Dudley's book "Cake Pops: Tips, Tricks, and Recipes for More Than 40 Irresistible Mini Treats" (available on www.bakerella.com), because I was amazed by the photography I saw in the online previews...and also because I don't need much of an excuse to purchase cute craft, baking, or (food) decorating books! Once the book arrived, I excitedly studied the photos, instructions, and tips, and finally put them to use for a coworker's birthday a few weeks later. In honor of an elusive mouse that had made its home in her classroom (and was consequently driving her mad), I created mice and cheese slice cake pops...which she found hilarious. Months later, I made a few dozen Spring-themed cake pops to sell at a festival alongside my soldered glass jewelry, and everyone loved them (more than the jewelry!). The next summer, I made the decision to step away - indefinitely - from teaching, to begin Sweet Whimsy Shop, currently an online cake pops business, with dreams of more!
It is very important to me that everything I bake/make tastes as good as it looks. For that reason, I've chosen to bake everything from scratch (instead of using boxed cake mixes and canned frostings). To make my cake pops, I start by baking a full sheet cake (from flour, sugar, eggs, butter, milk, vanilla, baking powder, and salt....and a few other ingredients, depending on the flavor). Once the baked cake cools, I mix it with a from-scratch frosting (envision an entire frosted cake or cupcake being tossed into and mixed up in a mixer). The cake & frosting combo forms a pliable mixture that I sculpt (or roll) into the basic shape of the cake pop. That mini sculpture of "cake dough" is then placed on a lollipop stick, then carefully dipped into melted chocolate. Sometimes, I add decorations like sprinkles, sanding sugar, or candies, while the chocolate is still warm/unset. For other designs, the decorations or details are added after the chocolate has hardened/cooled. I often use melted chocolate to pipe details, in the same way a cake decorator might use a pastry bag to pipe icing designs on cakes.
Regardless of how/when each cake pop is decorated, the result is the same: a tiny, tasty, handmade piece of art. My cakes pops are not made in a mass-production, or mechanized process. I don't simply combine a boxed cake mix with eggs, water, and oil, then pour the solution into an electric cake pop maker or into circular cups in a baking pan, and then dip those "prefab" cake balls into chocolate. The process I've chosen is much more labor-intensive, with a greater commitment to quality, and with careful attention to detail. My clients value that kind of quality and recognize that they are getting so much more than "just" a cake pop. I love what I do, I take a lot of pride in how I do it, and I'm so very grateful for my faithful clients who support my craft and business!
